Plug-and-Play’s abbreviation is PnP, that is suggested by Microsoft. The time users start plugging an HP, Dell, AOC, View Sonic monitor with the PC; it will start on its own. The PnP monitor emerged because the system is unable to recognize monitor’s manufacturer and version so the system of Windows like Windows 7, 8 and 10 will probably download a generic monitor driver which in comparison is not as helpful and supportive as the manufacturer’s driver for this monitor. That’s the reason that in device manager generic PnP monitor and generic non-PnP monitor takes place of the original monitor. There are two main components of the monitor driver. The first one is screen resolutions and the other one is refresh rates.
How Does the Generic PNP Monitor Start?
The time you open device manager on your system, you see a generic PNP monitor list, and there is not any yellow sign of exclamation. It is not unusual as many of the laptop monitors appear as the Generic PNP monitor. Your system’s screen and the monitor settings will also work normally. The generic PNP/Non-PnP monitor is a frequent happening issue and will appear like the below conditions:
- The time you upgrade Windows system from Windows 7, 8 and 10, the desktop monitor or PC monitor is taken by the generic PNP monitor or the Non-PnP monitor, that indicates issue with the yellow sign.
- The time when users are about to connect the monitor to system through HDIMI or VGA cable, it is unable to identify by the system, and you will see that the monitor is not appearing in device manger also. The PnP monitor shows itself the time you remove graphic card driver.
- When users include second monitor to system, you will one display as the real monitor, but in device manager the other one display as Generic PnP monitor.
- At times including some latest hardware like SSD and update the Windows 10 version, the monitor doesn’t stay firm, and your system feels the variation from the real as well as generic PnP monitor.
Following are some ways through which users can solve this issue:
Method 1: Reconnecting Monitor to PC
You can solve your problem by inter connecting the monitor and rebooting the PC. It will support you to resolve the problem that the PC can only utilize the generic PnP monitor. For those who use the laptop generic PnP monitor and face this problem, they can go for other methods.
- Firstly switch off the PC and monitor.
- Now delete the monitor power cord for some time so that all the capacitors drain in the circuitry of the monitor.
- Then delete the video cable from the system.
- After the completion of above steps wait for some time and then plug the power cord and video cable.
- At the end restart the PC and switch on the monitor.
You will see that Windows will find detect the devices on its own and after identifying your monitor, the old monitor is back.
Method 2: Updating the Monitor and Graphic Driver
As you know that your monitor driver has misplaced, the generic PnP monitor will show. Updating Generic PnP Monitor driver will support your Windows to get back the real monitor once again.
- Open Device Manager.
- Expand the Monitors and find the Generic PnP monitor.
- Right-click it to choose Update driver.
- Now Windows will find its way to update the Generic PnP monitor driver for your Windows via automatic processing. Then you will see the real monitor will be back again.
In case you are utilizing a desktop, you can also go for the next points if the above mentioned steps don’t work.
- The time you tap Update driver, you can visit: Browse my computer for driver software > Let me pick from a list of device drivers on my computer.
- Go for the option of Show Compatible Hardware. Here you will see the real monitor is registered. Select the monitor.
- Now go for the same way to update the graphic driver by the Display Adapters > Graphic card > Update Driver to update it.
- Then you will see the real monitor is coming back again.
In case the device manager is unable to search the monitor driver and download it for you, utilize the automatic processing to support you.
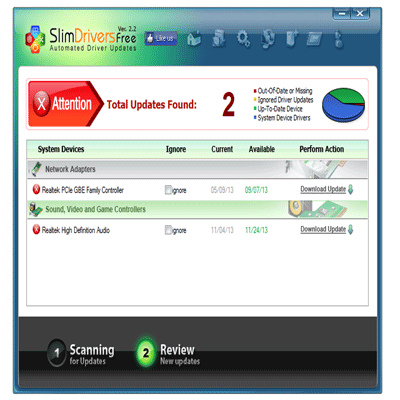
Note:Driver Doctor can also support you solving the misplaced monitor driver or hide issues. It is known as a best Windows driver finder, updater and installer.
- To scan all your system’s hardware devices currently present in your system like monitor and graphic card use Driver Doctor.
- Find Drivers now.
- You can also install all the newest versions of drivers.
- Users can download driver by searching the device and tap on Install button.
Usually updating the monitor driver is not very important at this stage but it will support PC to set the best results.
Method 3: Deleting Generic PNP Monitor Driver
There are people who have complained that they see that there is only a generic PnP monitor with not any sign of exclamation, but some people also have complained that they see generic PnP monitor with a yellow triangle or a generic non-PnP monitor along yellow exclamation. In this case, it might be the possibility that there is something wrong with Generic Monitor, so you can delete it.
- Go for these steps: Device Manager > Monitors > Generic PNP Monitor > Uninstall to remove the monitor.
- Press to View>Scan for hardware changes.
- At the end, the yellow exclamation will no more be there and your generic PNP monitor will change to the real one.
Method 4: Updating Windows Version
For some reasons, updating windows might probably be an effective method in case you are having trouble with graphic driver and monitor. This method will also support you to update all the services and drivers such as monitor, graphic, chipset.
- Firstly, write Settings in the search bar, and select settings from the search result.
- Now select the late one: Update & Security.
- Then locate Windows Update, and pick to Check for updates on the right side.
In case there is a version available to update, then you should try to download the update for your PC.
Method 5: Running System File Checker
System file checker is a built-in tool to help users to scan the troubling driver and system files, and then restore those files that are causing harm. Now run this tool for the sake of scanning in case there are some conflicting files with the monitor driver files.
- First write command prompt in search bar, and you will see the result. Then right-click it and choose Run as administrator.
- Press sfc/scannowand clickEnter.
- You will see now that Windows system will start scanning your PC file and finish this issue.
Conclusion:
Above are some solutions to resolve your problem in case you are unable to sort it out on your own. We hope that any of the above methods will be helpful.


