

It is very simple to delete or uninstall Windows 10 is the case you don’t like the way it works or want to go back towards some old version of your Windows, according to your preference. The bad thing about Windows is that it doesn’t have any automatic system of processing for older versions and you are supposed to track down some downloaded media, back up your files, and find your software key to getting back to your last PC. How to uninstall windows 10?, this post will help you to find out answer of that question.
The usual steps work for any Windows OS going as far back as Windows XP although we don’t suggest going that far back as Microsoft finished assistance for it. Keep in mind that new PC’s have parts that weren’t manufactured when older Windows versions including Windows 7 and 8.1 were sold.
In case you want to know how to uninstall windows 10, there are two ways to do it. In first way you can upgrade from Windows 8.1 or 7 within the last 30 days, there’s the easier way of going back that takes some effort and it doesn’t remove your files. You just need to download the previous version of Windows or move to Linux so you can delete Windows 10 without leaving a blank hard drive at back.
What Users will Require to Uninstall Windows 10?
You should go for backing up significant PC files to some separate place before you start for anything else. A cloud storage service or an external drive is good, till the time it is not connected physically from the Windows PC you’ll be working on. Windows are unable to maintain programs or settings when going to an outdated version, so you’ll also want to get downloaded media for some complicated programs, like those that need serial numbers. It’s also important that Microsoft doesn’t assist Windows 8 and only support Windows 8.1 because it was part of an automatic way of the update cycle.
It’s better to download drivers for your PC other parts before you go for download. It will make everything simple in case Windows doesn’t choose well-suited drivers via automatic processing. Devices like Ethernet, WiFi, Motherboard chip-set and graphics drivers make the process of setting up simple. Users can save these drivers on a USB thumb drive for availability once Windows ended downloading.
Now get downloaded media for Windows. Microsoft gives install service that permits you to send the downloaded files to a new DVD for Windows 8.1 or utilize USB. In case you’re downloading an outdated version of Windows, You should have the original disc (and an external CD or DVD burner as well in case your latest laptop doesn’t have a disc drive). On the contrary, you can also make a bootable USB drive with the help of Windows ISO. Here you should also have the Windows product key for whatsoever version you select. It is the 25-digit code that came along with Windows retail box or purchase receipt from Microsoft. It can also be located somewhere on your PC’s case.
Note regarding Windows 7
Windows 7 is very famous of occasional utility among power users that need to change or resolve previous software. Windows 7 is unable to download, upgrade or keep files when downloaded on a system that is running Windows 10, so here the only option is to download a new one to sort your problem out.
Going back to Windows 8.1
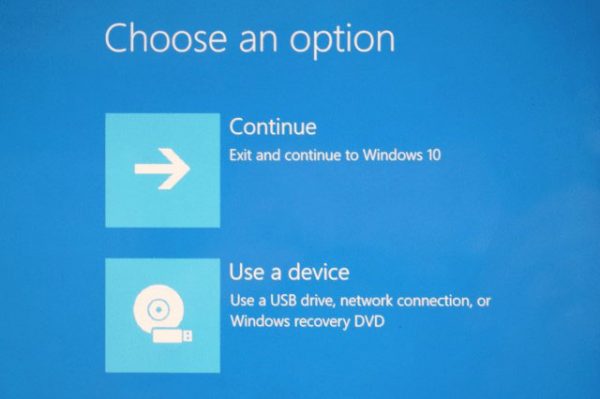
You supposed to delete all other external storage cards, drives or discs, and enter the Windows installation disc or drive. The time you have just completed backing up your files and other programs, just reboot your system and boot it from that drive. It needs entering a keyboard instruction to open the boot menu, or entering the BIOS (or UEFI on newer laptops and tablets) and choosing the drive on your own. In case of discs, choose your CD or DVD drive. For thumb drives, you can choose “USB” or “USB-HDD.”
You would be able to see that the Windows setup process will start. For Windows 8.1, the first screen will ask you to choose your location, language, and keyboard localization.
Tap “Next,” then “Install now.” Wait for the process of setting up to start.
Installation Stage
“I accept the license terms,” phrase will pop up, just tap it. Then“Next” on the license screen.
The next screen has multiple options, “Upgrade” and “Custom.” You supposed to select Custom option. You would be able to see that the Windows 8.1 installation system cannot upgrade from the latest version of Windows to a previous one.
Now you’ll have to choose the downloading drive or partition. In case your system has a single hard drive or SSD, then this is the largest partition that is accessible. Now you have two options available: Press the drive and then tap “Next” to keep previous Windows files in a folder in the latest installation. For the sake of a secondary backup, it is a helping way, but it will not keep downloaded programs, and there might probably be some reliability problems with gaining access to the previous files. It would be good to initiate fresh by formatting the download drive: You can do this by tapping “Format,” then “OK.” Now, wait for the completion of primary drive to formatted and press “Next.”
The setup program will copy the Windows files from your downloaded media to your PC and download the OS on its own to the other screen. It will take some time till you supposed to plug in or plenty of battery power left. See till the process is completed. Your system may reboot on its own.
Now you would be able to see Windows 8.1 start its initial processing of boot up. Now you can choose a few settings. Just go for the commands that are on the screen, enter your username and password where required and tap to “Finish.”
Upgrade only For Windows 8.1 and Windows 7
In case you’ve used Microsoft’s free upgrade from Windows 8.1 or 7 to Windows 10, you can go for a more advanced automating processing to downgrade your software with the help of Windows. This method is simple than the mentioned above because it will keep some of your files, it’s better to back up personal data in the condition that something can go wrong.
You can utilize this procedure after the upgrade of 30 days but now as the Windows 10 Anniversary Update has decreased to the limit of 10 days after the time you update. There are some who say that can maximize the time limit but obviously we can’t trust them like this.
The operating system will remove the old OS files to make room on the hard drive after the given time limit. In case you’ve started Windows 10’s disk cleanup process it may have removed those files already, but only in the condition of starting them on your own.

This method will not allow you to go back to Windows 8 and it is only workable for Windows 8.1.
If we talk about the upgrading of Windows 10 part it involves moving to 8.1, so that’s technically the last OS download on the PC. In case you need Windows 8, you’ll have to utilize the commands mentioned above, and even after that in case you have the genuine media, and turn off updates.
You can go to the main Settings menu in Windows 10, and tap “Recovery,” then press to “Go back to Windows 8.1.” or “Go back to Windows 7” and go for the commands that pops up on your system’s screen.
Follow the Screen Instruction:
You would be able to see that the system will start the process by asking why you want to go back to your last version. Microsoft is just waiting for more information, and it won’t take any effect on the process of downloading itself. Now it will help you to know that your files will still be there, but you’ll have to download the app again and any settings will be lost. You might probably need your old password in case it has changed the time you updated to Windows 10.
The time when you think you are ready just tap “Go back to previous Windows” and wait for some time till your PC starts rolling back. This whole process will take some time and the system will restart many times during this time.
This option is only accessible for the first month after upgrading, and isn’t workable with last versions of Windows (not even with the original Windows 8.) Microsoft’s process will keep the information of your local files, but it doesn’t save any settings or third-party programs.
How to uninstall windows 10 is a major query that users might probably think about because most of the users have updated their systems with latest version of Windows 10, still there are some users who don’t want to work on Windows 10. It is important to know How to uninstall windows 10. We hope that from the above article users can do it properly.


