For a long time ago users face one of the most important issues plugged in not charging, but there are many methods that can resolve this trouble but they work differently according to the preference of people. When this problem occurs the charging icon shows that your charger is plugged but it is not working and charging your laptop’s battery.
Other times you can see your laptop battery showing its status remains at 0% although the charger is still connected to your PC. You might probably be worried right now but don’t, because here we will tell you the cause of the issue before your laptop shutdowns.
In the first step users have to find if this is an issue of the operating system (Windows) or the hardware itself is the reason of making conflict and for that purpose, you need to use Live CD of Ubuntu (you can also use Slax Linux) to test if you can charge your battery in this operating system. In case the battery is still not charging then there is some serious trouble with your Laptop’s battery and it I time that you should change it.
Following are the ways through which you can fix plugged in not charging issue:
Note: Users should not forget to create a restore point in case something goes wrong.
1. Are You Plugged In?
For users, it would sound funny, but you need to make this thing sure that the laptop is connected. There is not any software or hardware invented yet that can repair a disconnected laptop power on. Before doing anything else, make sure that the AC outlet and laptop plugs are tightly seated with your system.
After that users should check the AC adapter brick and verify that all removable wires are stuck in properly. Make sure that the battery is properly seated in its compartment, and that there is nothing wrong with either the battery or laptop contact points. In the end, find out if the trouble doesn’t lie with the laptop at all: For that purpose try plugging the power cord into a different outlet to see if your system has got a short or a blown fuse.
We have resolute that it’s not just user error that is the reason of trouble. There might probably be a real problem with the charging of the laptop; now it’s simply a matter of time and understanding one take that where the problem lies. You should start with eliminating where it isn’t. We’ll start with the most common and easiest issues here that can be discussed and explained.
2. Lose the Battery
One of the simple ways to check the integrity of your battery is to cut it out altogether and try plugging in the laptop. In case the laptop powers on normally, the trouble is probably that your battery has expired or wasted and that’s the reason it is not working properly.
3. Make sure you are using the Right USB-C Port
USB-C is a famous criterion for peripherals charging and transferring data from one place to another. Its new standard allows thinner devices, but might also cause some complications and doubts. There are manufacturers that have picked to make USB-C ports data-only (therefore these ports won’t help you in charging your device).
Like the new Huawei MateBook X has two USB-C ports: One of them can be used for charging or transferring data, and the other one is only designated for data transfer or connecting to a dock.
In case you run into a non-charging issue, make sure you are connected to the right USB-C port.
4. Check the Connector
Plugged not charging errors sometimes occur when you plug in the laptop’s power connector, it is very important that the connection should be fairly solid. In case it is loose, or the socket gives when it should not loose the power jack may have broken inside the chassis. Is there any sort of burning smell? Is there seems to be any damage to the power connector, repairs will be in order.
5. Beat the Heat
Another reason for the trouble is a non-charging battery that can sometimes be caused by an overheating laptop. It is also the reason for the plugged-in not charging. There are two problems you are having right now, with the system shutting down to avoid overheating a battery and causing a fire. As the temperature increases, the battery sensor may misfire, telling the system that the battery is either fully charged or finished, reason for the charging issues.
Errors like these are more common if you are dealing with older laptops, which don’t have the quality of cooling technology, or when you are using the laptop on the couch or in bed, with a blanket or pillow that covers the cooling vents. In this situation let the system cool down first and take some time to make sure that the air vents are cool and clean.
6. Reset your BIOS Configuration to Default
- To resolve plugged not charging error you can Turn off your laptop, then turn it on and simultaneously tap F2, DEL, or F12 (depending on your manufacturer)
to enter into BIOS setup. - After doing that now you’ll need to find the reset option to load the default configuration and it can also be named as Reset to Clear BIOS settings, default, factory defaults Load, Load setup defaults, or something like that.
- Then Choose it with your arrow keys, click Enter, and make sure the operation. Your BIOS will now use its default settings.
- As now you logged into Windows see if the trouble with the charging is resolved yet or not.
7. Update your Drivers
For Windows Laptop Users
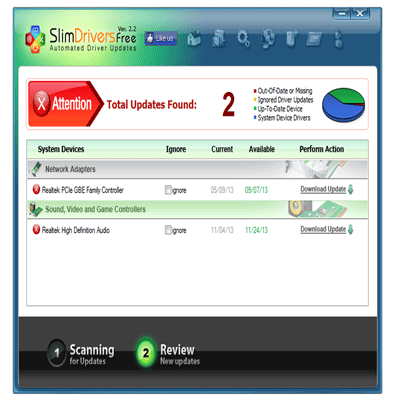
First, you can open the Device Manager. Under “Batteries” here you should see three items, one for the battery, another for the charger, and a third listed as “Microsoft ACPI Compliant Control Method Battery“. You will open all three items, which will bring up a Properties window. In the “Driver” tab, you’ll see a button named “Update Driver.”
Now you will go through the driver update method for all three items explained above. After performing the above instructions the drivers are all up to date, reset the laptop and plug it in again. In case this doesn’t solve the trouble, delete the “Microsoft ACPI Compliant Control Method Battery” completely and reboot your system.
For Mac Laptops
If you have a Mac you’ll try to reset the System Management Controller (SMC). For laptops that have removable batteries, this is a basic step as removing the battery, shutting down power, pressing the power button for 5 seconds, and disconnecting power. Users can Reinsert the battery, connect power, and fire up the laptop.
For updated and more modified Macs with batteries sealed into the chassis, shut down the system and leave the power adapter connected. As the power is off, tap and hold the power button while clicking the Shift-Control-Option keys on the left-hand side of the keyboard. Now you can release the keys and power button and then attempt to power on the laptop.
8. Call In Outside Assistance
If you didn’t already do this is for sure a good time to contact tech support. Your specific make and model of laptop has its own particular issues, and a seasoned tech support operator will have seen all of them. That person will likely walk you through many of the steps outlined above, but will also be aware of software and hardware problems specific to your configuration, such as what bits of hardware normally cause conflict.
9. Download Power Manager for Windows 10
This method is used by people who use Lenovo laptops and facing the battery issue. You can handle your issue simply by downloading Power Manager for Windows 10 and installing it. After doing that you can reset your system to save the changes you made earlier and now your problem ended.
10. Run Windows Repair Install
This is the last way through which you can make your system work, in case nothing works out from the given methods above. Repair Install just uses an in-place upgrade to handle issues with the system without erasing user data that is in your system.
Conclusions:
It would be straining and irritating if out of nowhere your laptop starts plugged in and not charging. It would probably affect your daily routine tasks that are interlinked with your system. To solve charging issues of your laptop you can follow any of the above methods. Hopefully, you would be able to make your laptop’s battery workable again.


